Skip links

Setting up the Facebook Sales Channel for Shopify Store

Designing an eCommerce store is a significant step in digital marketing but not a whole thing. Until and unless you reach out to your customers in boundless ways, you can not sit back while embracing perpetual customers’ order requests. By every possible way that you prioritize to sell – search engines or social media marketing, you are publicizing your brand to your customers on various platforms.

But how to reach your audience or potential customers? Facebook is the ruling solution. 

Facebook is the number one social network in the world and the third most popular site in the world after Google and YouTube. It is the place where you will find 2.6 billion potential customers, browsing an average of 58 minutes on the platform. Not only retailers can benefit from the Facebook shop features, but bloggers or anyone can make the best out of it and can get in on the action.

If a search engine helps you promote your Shopify store to searchers, then the Facebook Sales channel tends to help you advertise your products socially. And these two powers – search engines and social media marketing, inaugurates additional revenue streams and opens up opportunities to meet new customers.

What is the Facebook Sales Channel?

A Sales Channel is basically a place where you are setting yourself as a business and will eventually sell your merch. All the places including your online store is a Sales Channel. In fact, selling on popular places like Facebook, Instagram, Amazon, etc. can get your business better coverage in advertising, and drifting sales. To deduce, the various platforms you surge to sell on are your sales channels.

Facebook Shop allows you to showcase your products and collections on your Facebook page and Instagram profile in a way that offers a native shopping experience, enabling your customers to buy their desired products.

Facebook Sales Channel is precisely designed and built in a way to link with your Facebook Business Page. Whenever and however someone browses or riffles through your store on Facebook, they will find a similar store and whole selection just like it is in your standalone website. Hence, alleviating the stumbling block to open up a new tab to your online store. 

One of the exemplary purposes of social media platforms – Facebook or Instagram, is to compress the sales process to a single click. This will aid your customers in hassle-free and facile shopping encounters. 

Benefits of Facebook Sales Channel – Increase Your Sales on Shopify

Being a versatile social media platform, you give complete access to your customers to rejoice at shopping while socially connecting with people online. Your customers can browse your inventory anytime, using the ‘Shop’ section on your Facebook page. 

Let’s take a look at the benefits of Facebook Sales Channel, simply known as your Facebook store:-

1. Setting Up Your Facebook Store is a Fluent Process

Integration of Facebook with Shopify is a simple and easy process, helping you to add your products to Facebook with just a single click. Any update on your standalone Shopify website will automatically sync to your other integrated sales channel. If you feel the urgency of customizing any product, description, or pricing, do it straight on Shopify admin and it will consequently get updated on your Facebook store as well. 

2. You can Easily Reach Your Mobile Customers

As 3/4 of the total Facebook users use mobile devices to access the sterling features of Facebook, the Facebook Sales Channel was designed for mobile users. Engendering a pristine set of audience, the Facebook Sales Channel is optimized to display on mobiles screens, and for quick loading performances. Thus, Facebook becomes a mobile and desktop-friendly, sales channel alternative for your online store and a compatible platform to reach a greater number of prospective customers.

3. A Honed Means of Advertisement

Through your Facebook Business Page, you can launch an online, social media marketing campaign. Running ads after segmenting your audience into categories like demographics (age, gender), location (locals or global), and interests in products they have already manifested can prove to be a milestone in displaying, and advertising your products all over the world. 

4. Reduces the Hassle in Sales Process 

Facebook Business Page and Sales Channel truncate the distance for communication between you and your target audience. They can then go directly to your Facebook Page and shop there or can be competently directed to your standalone Shopify store. In this way, you are not only shortening the sales process but also keeping it under one click. Also, purchasing a product through Facebook is as secure as in the Shopify store and customers can also save the payment information for their future purchases. 

How to Set Up a Facebook Sales Channel for Your Shopify Store?

Shopify is the leading eCommerce platform allowing merchants to sell on multiple integrated sales channels. This entails an ace in the hole as you can sell on your own Shopify website, Facebook, Messenger, Instagram, Amazon, eBay, and more, all from one dashboard.

Buckle up and get to work – setting up your Facebook Sales Channel for Shopify Store. Follow these quick and easy steps to substantially integrate Facebook and Shopify on digital selling estrade. Alternatively, you can hire an eCommerce Facebook Ad agency to do these for you.

Step 1: Create Your Shopify Store

The basic necessity of integration is creating your Shopify store from exceptionally possible concepts to manifestation. If you have a lack of expertise or knowledge of Shopify, you can hire Shopify designing and development experts – Pictonix. Otherwise, simply head to Shopify.com and create an account.


Get Started Today!

Shopify assists online entrepreneurs to design their stores with as minimal effort as possible. Its recurring updates ensure, merchants adapt to the most modern features and functionalities. Hence, choosing Shopify for creating your online store is the best on-the-go and vital alternative.

Once you are done you can harness your store from the Shopify dashboard – known to be the command centre or cockpit of your digital aviation. 

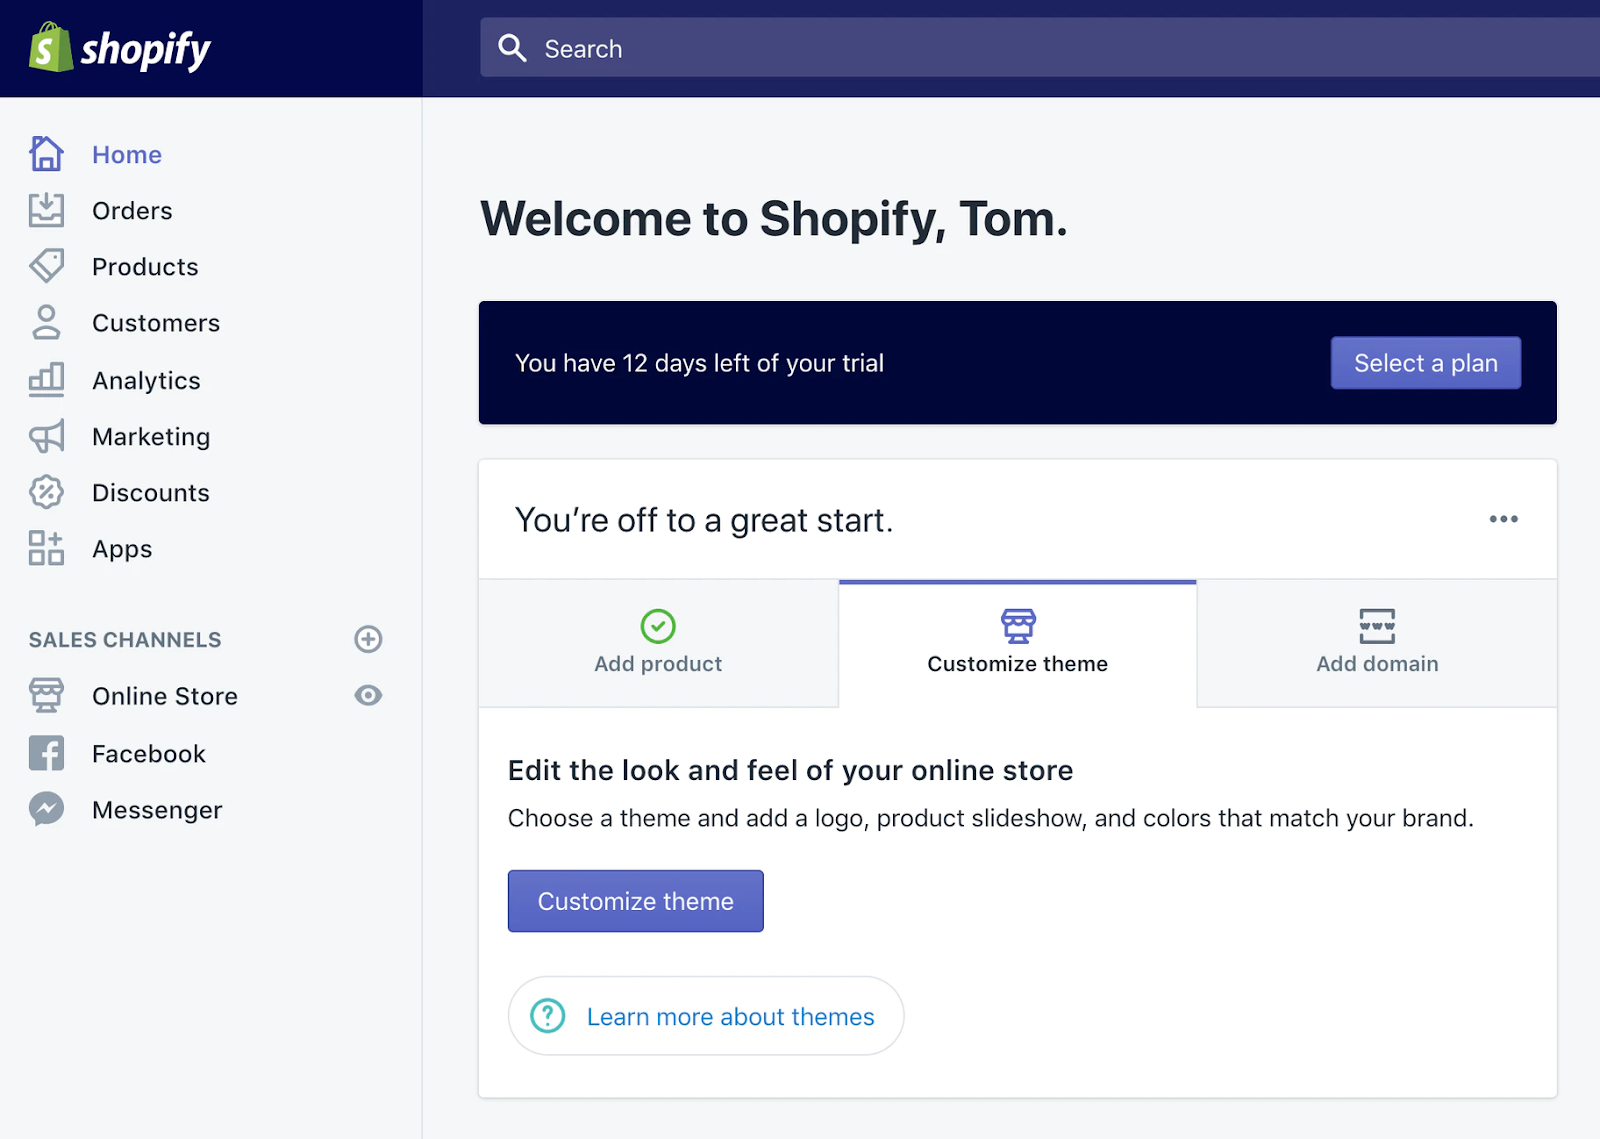
Shopify Dashboard – Pivot of Your eCommerce Empire

Add a product, customize your theme, add a domain name, and select payment gateway to complete the set-up of your Shopify store. For further assistance, check out the essential steps mentioned in: Build a Shopify Store — Get Online!

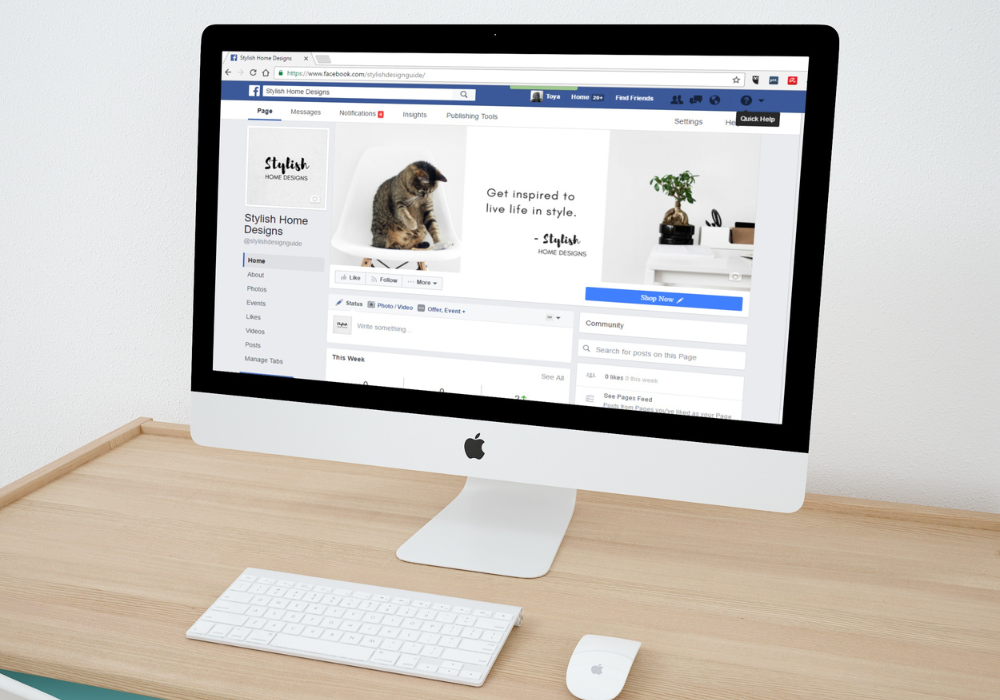
Get going with the integration by creating a sterling Facebook Page for your Shopify store.

Step 2: Connect the Facebook Page to Your Shopify Store

Click the ‘+’ button just next to the ‘Sales Channel’ button at the left-hand menu on your Shopify dashboard.

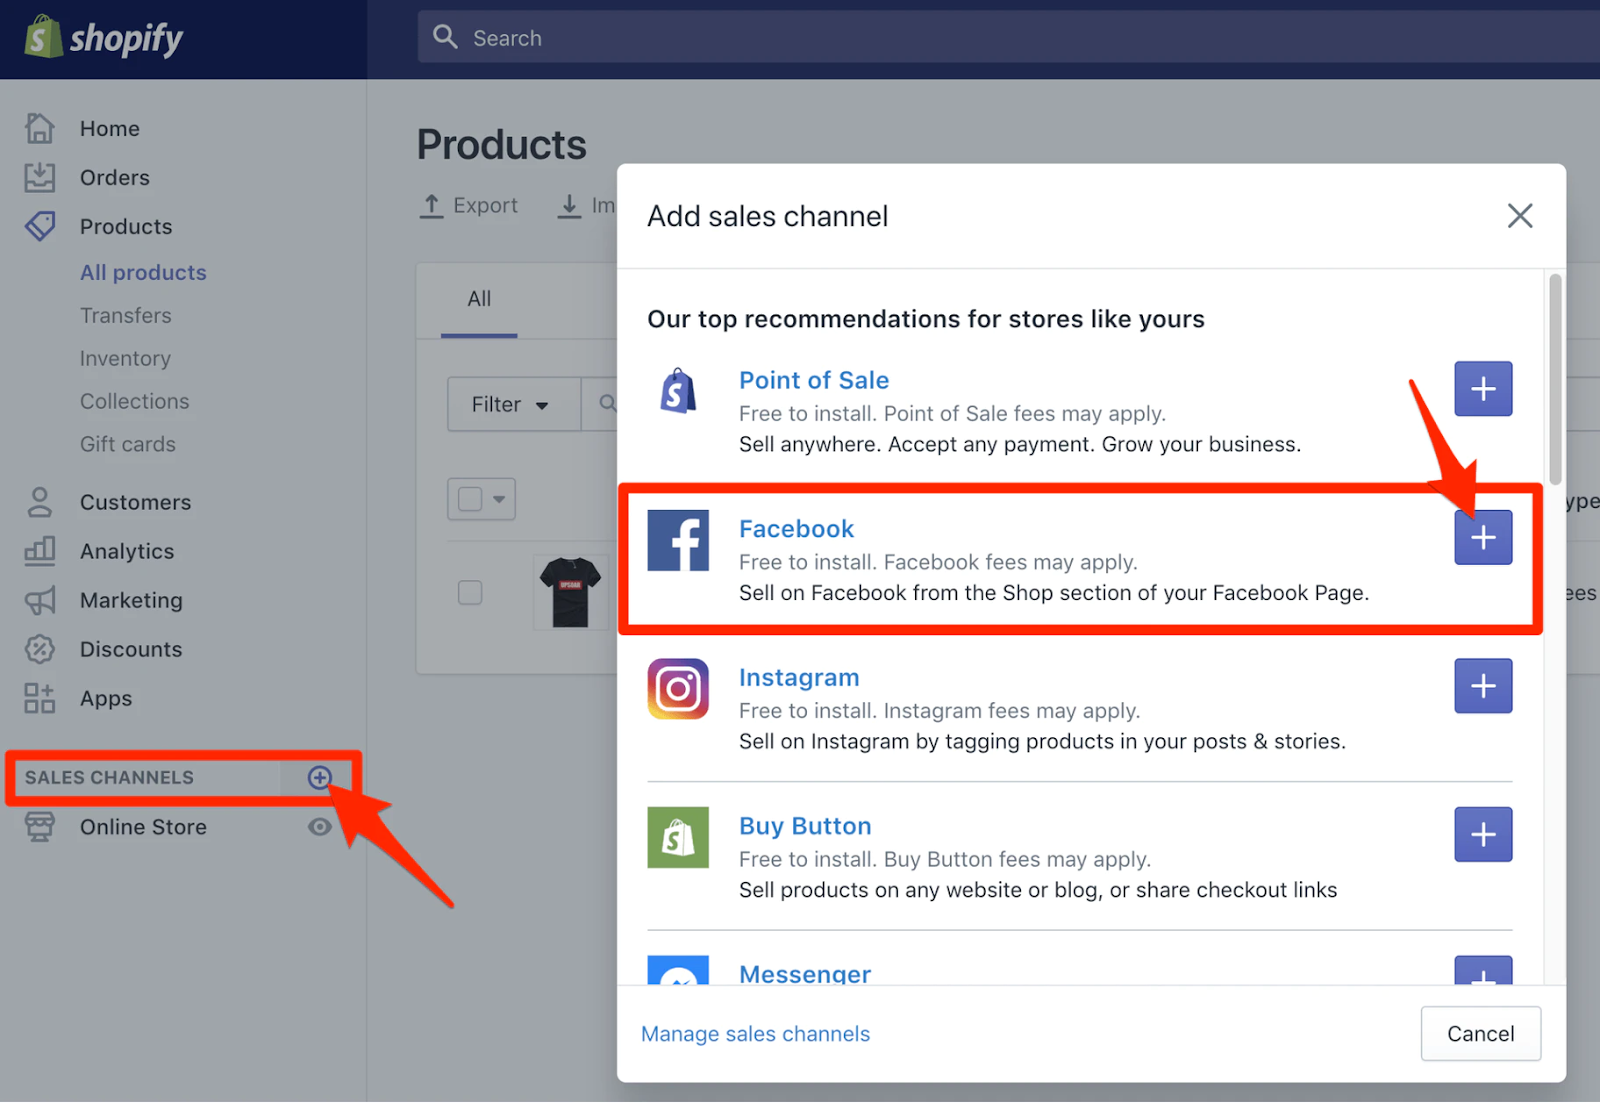
Add Required Sales Channel to Your Shopify Store

Next, head ahead by clicking on the ‘Connect Account’ to connect Shopify with your Facebook account.

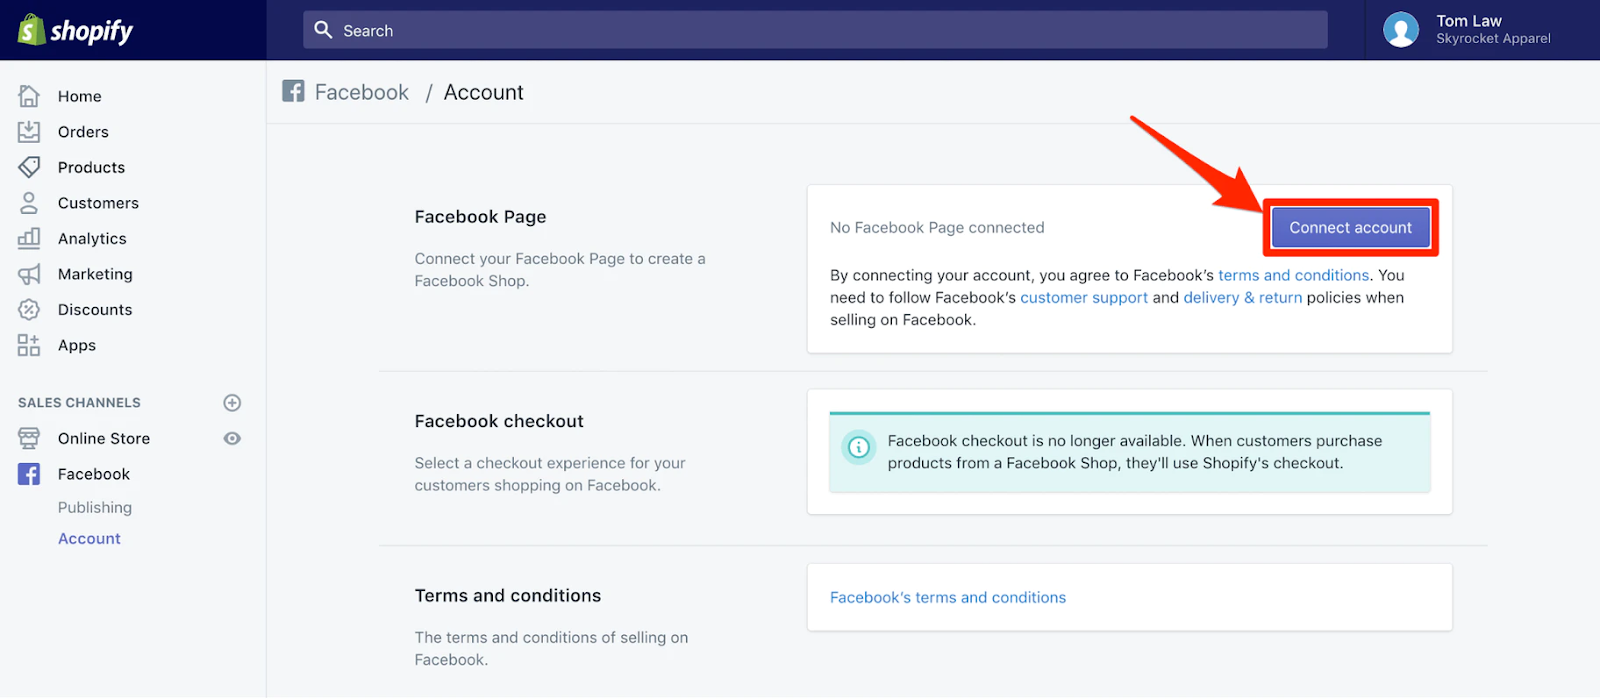
Connect Your Facebook Account 

Then, Facebook will ask for your permission to allow Shopify to ‘Manage your Pages and publish as Pages you manage’. Click ‘OK’ and proceed.

Once you have granted access, use the drop-down menu to select a Facebook page, if you have multiple pages, to create a Facebook shop for that particular page. Click ‘Connect Page’ to continue. 

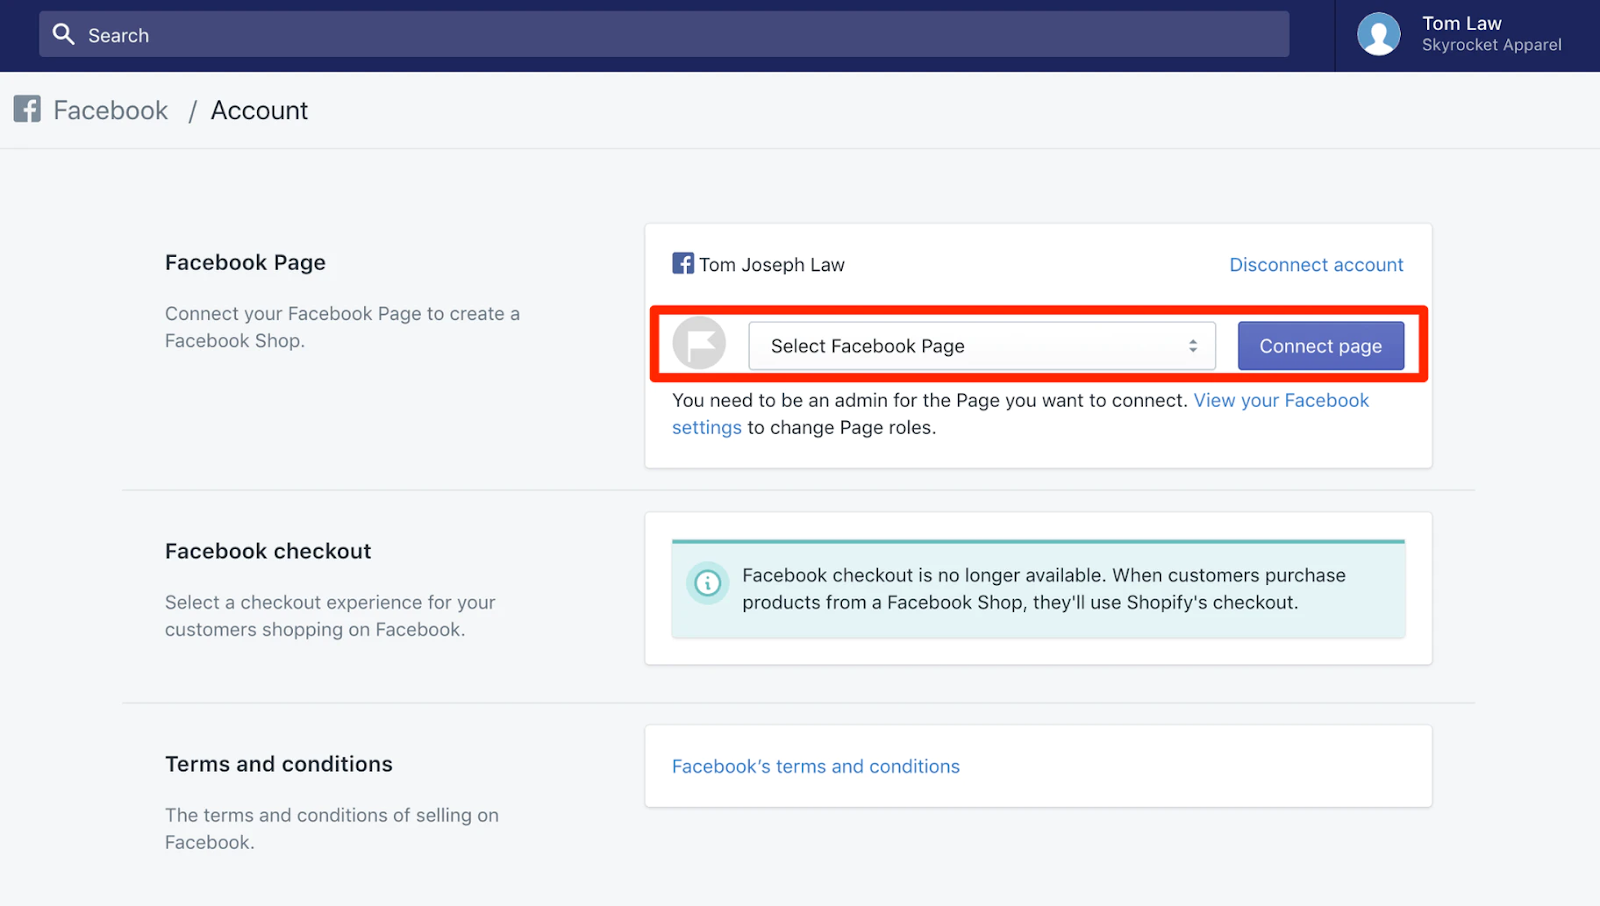
Connect Your Facebook Page

Next, use the drop-down menu to select the Facebook page that you want to create a Facebook shop for. Once you’ve done that, click “Connect Page.”

When you connect your page to the Shopify store, you will be asked to agree to Facebook’s Seller’s Terms and Policies. Read and click on the ‘Accept Terms’.

It will take up to 48 hours to review and approve your Shopify store to connect with your Facebook Page. Once Facebook approves your store, you will need to sign up for one of Shopify’s plans and click ‘Enable’ before you can start selling through your Facebook store.

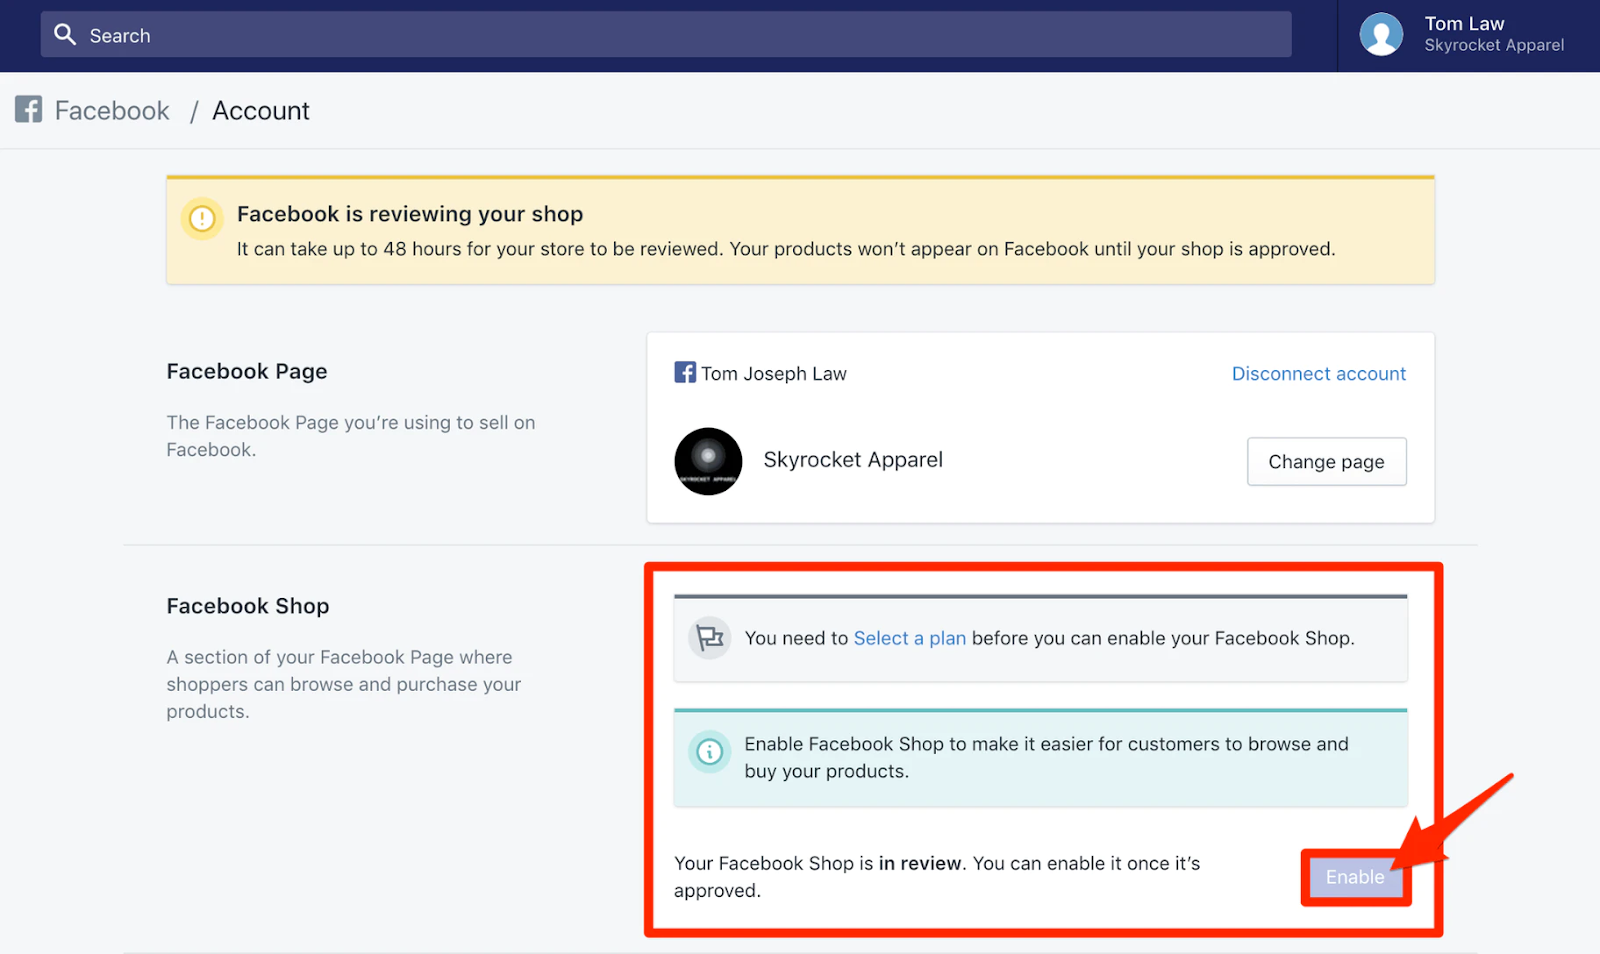
Enable Facebook Shop To Sell 

Step 3: Select Products and Collections for Your Shopify Store

After linking your Facebook Page to your Shopify Store, accelerate your sales by setting up your Facebook shop.

Head to the Shopify dashboard to add products to your Facebook store. Click the ‘Products’ tab and pick the products you want to add to your Facebook Shop. 

By clicking on ‘Actions’ to open the action menu, and then click ‘Make products available.’ Select the sales channel from the popup window that you want the products to be displayed on. 

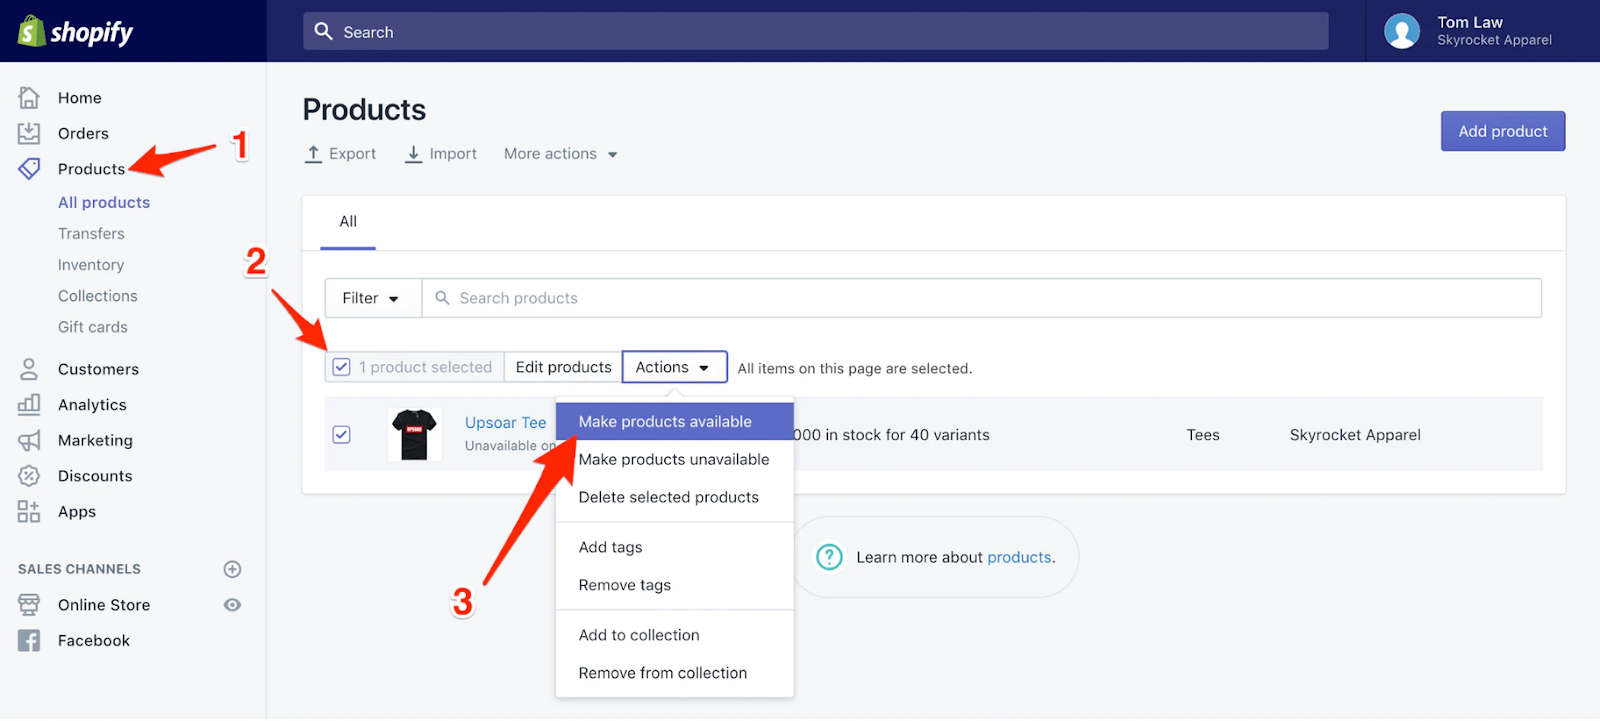
Make Your Products Available for Your Customers

In fact, adding collections to your Facebook shop has the same process. Simply, click the ‘Collections’ tab in the Shopify dashboard and reiterate the process.

Step 4: Edit the Arrangement of your Products

To edit the display order of your products, outrun your store’s prudence by heading to the ‘Publishing’ tab under ‘Facebook’ in the sidebar. This will allow you to add, remove, arrange, and re-arrange collections on your Facebook shop.

Systematically Arrange Your Products Listing

After following these steps you will find a new ‘Shop’ tab featuring your newly added products and collections similar to your Shopify store.

Just after you have connected a Business Page to Shopify, Facebook will begin reviewing your store and products to gather the data. This usually takes a duration of 48 hours, but sometimes can even take a day or two longer. If it has been longer than 4 days, and your page still has not been approved by Shopify, simply disconnect and unlink your account from the Facebook Sales Channel. Then re-do the steps from the first step. If, even after four days from the second time you linked your Facebook account, it has not been approved, then reach out to Shopify’s Support for help troubleshooting.

As soon as your account has been verified and your Shopify’s store data is retrieved on Facebook Sales Channel, you will be notified via email. 

Facebook Product Image Guidelines

According to Facebook’s detailed guidelines and recommendations, your product listings must encompass the following parameters:

  • At least one image has to incorporate for each product listing
  • Without any graphical representation, the image must be of the product itself.
  • Show a good resolution product image of 1024 x 1024 or higher for a more realistic look.
  • Use the image in the square format with a white background.
  • Never use images with text and offensive content.
  • The description needs to include rich content without the presence of HTML.
  • Limit yourself to precise and easy product description.
  • Write a great product copy – grammatically correct and properly punctuated.

Once you have followed our recommended steps, never forget to click on ‘Save’ at the end.

Conclusion – Garner Revenue With Facebook Sales Channel

Though Facebook is a big fame game of social media marketing, reaping the benefits of Facebook is handy and hassle-free. Keeping your product offerings inside the most popular social media platform in the world, you are adhering to the strength of digital marketing and its assets. 

The Facebook store will establish enormous possibilities to:

  • Make capital out of social engagement.
  • Abbreviates friction in the sales process.
  • Leverages a great deal of promotion.
  • Boost sales by tagging products to your posts.

To all the major retailers and naive entrepreneurs, you can always access the boundless possibilities of the triumphant integration between Facebook and Shopify. As Shopify experts, Pictonix is always primed to guide you through a transcending Shopify store and boost your sales. 

Setting up the Facebook Sales Channel for Shopify Store is a golden deal to put you in a daze!

You might also like: How to Get Sales on Shopify and Grow Your E-commerce Business?

Email Us

Discover how our CRO expertise can transform your eCommerce business. Contact us for a consultation that guarantees increased value and trust.